Using OpenCV
Goals
- Starting opencv3 docker
- Read, save and show an image
- Use cv.imread, cv.imwrite
- Show figures in matplotlib in ipython notebook
Starting opencv3 Docker to run the tutorials
- Install docker on your system
- Git clone the opencv_tutorials
mkdir opencv
cd opencv
git clone https://github.com/naren-m/opencv_tutorials.git
- Docker pull the narenm/opencv:py3 image
docker pull narenm/opencv:py3
- Start the docker image
docker run -it -v $PWD:/code -p 8888:8888 narenm/opencv:py3
In the docker prompt
- Start Jupyter in the docker and open the ipython notebook with token specified.
/run_jupyter.sh
Read an image
Use function cv2.imread to read the image. Image should be in current working directory or should be given a full path.
Using the second argument(optional) for function, we can specify the following flags
- cv2.IMREAD_COLOR : Default flag. Loads a color image
- cv2.IMREAD_GRAYSCALE : Loads grayscale image
- cv2.IMREAD_UNCHANGED : Loads image including alpha channel
Note
Instead of these three flags, you can simply pass integers 1, 0 or -1 respectively.
imread Usage
import cv2

# load the image and show some basic information on it
image = cv2.imread('hongkong_airport.jpg', cv2.IMREAD_UNCHANGED)

# Image Details
print("width: %d pixels" % (image.shape[1]))
print("height: %d pixels" % (image.shape[0]))
print("channels: %d" % (image.shape[2]))
Output: width: 3264 pixels height: 2448 pixels channels: 3
Write an image
Use function cv2.imwrite to save the image.
First argument is file name and second is the image that we want to save
imwrite Usage
cv2.imwrite("newimage.png", image)
Showing image using matplotlib
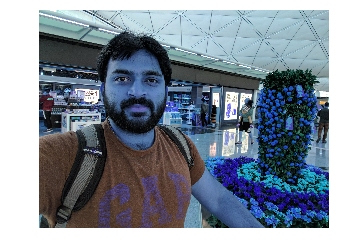
Using matplotlib.pyplot directly will give unexpected results as below.
Reason being
OpenCV represents RGB images as multi-dimensional NumPy arrays… but in reverse order! This means that images are actually represented in BGR order rather than RGB!
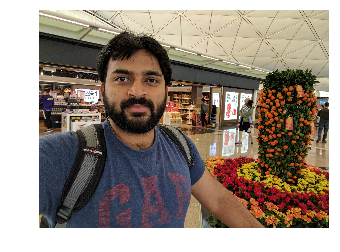
Fix for this
plt.imshow(cv2.cvtColor(image, cv2.COLOR_BGR2RGB))
plt.imshow Usage
plt.axis("off")
%time plt.imshow(image)
Output: CPU times: user 230 ms, sys: 30 ms, total: 260 ms Wall time: 261 ms
So I had a small helper function in image_utils module.
Importing image_utils module
import sys

sys.path.append('/code/opencv_tutorials') # path to image_utils.py
from image_utils import Ipy
Ipy.imshow helper function looks as below
@staticmethod
def imshow(input_image):
    """
    API to show mini image in ipython notebook, using matplotlib
    """
    import matplotlib.pyplot as plt

    cv_rgb = cv2.cvtColor(input_image, cv2.COLOR_BGR2RGB)
    plt.axis("off")
    plt.imshow(cv_rgb)
Ipy.imshow Usage
%time Ipy.imshow(image)
Output: CPU times: user 320 ms, sys: 10 ms, total: 330 ms Wall time: 328 ms
If we see the above image, it is small and not clear. So I had another helper function to show the bigger clear image.
Ipy.imshow_large helper function looks as below.
@staticmethod
def imshow_large(input_image):
    """
    API is to show bigger images in ipython notebook. Uses PIL, IPython.display and BytesIO
    """
    from PIL import Image
    import IPython.display
    from io import BytesIO

    rgb_img = cv2.cvtColor(input_image, cv2.COLOR_BGR2RGB)
    img = Image.fromarray(rgb_img)

    b = BytesIO()
    img.save(b, format='png')

    IPython.display.display(IPython.display.Image(data=b.getvalue(), format='png', embed=True))
Ipy.imshow_large Usage
%time Ipy.imshow_large(image)
Output:
CPU times: user 3.13 s, sys: 0 ns, total: 3.13 s
Wall time: 3.13 s
Caveat of using ‘imshow_large’ is, it takes longer time to load and show the image